
1 - Introduction & First week plan - 24/09/19
Updated: Dec 9, 2019
I have been given the task to create a cinematic scene from a film or TV series which will last between 30 and 60 seconds. I plan to update this blog at least once a week, documenting my progress and skills I have acquired throughout the module.
For my first week I plan to brainstorm ideas and create reference pages for at least 3 shows or movies I am interested in. If I am able to decide which film and scene i wish to create I plan on creating a concept and possibly blocking out the scene in Unreal engine.
From previous projects I have learnt planning is key so I am not going to cut any corners when it comes to the layout and design of my cinematic. I aim to have decided on all aspects of the cinematic such as the camera path and all the movement on screen before I start construction.
2 - Film Ideas and Mood boards - 25/09/19
Updated: Dec 9, 2019
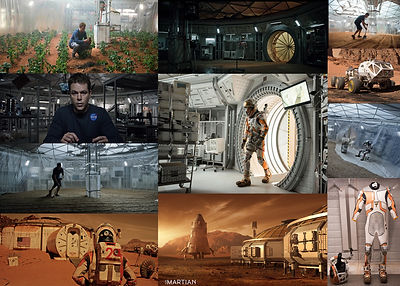
I decided to look into four different films with a wide variety to see what kind of scene I wanted to create. The four I chose were Blade Runner 2049, Star Wars, The Martian and the TV show Breaking Bad.
After making a mood board for each of them It helped me narrow my choices down as I could see which scenes would stretch my skills. I looked at both Star Wars and Blade Runner 2049 and felt the better environments were outside and beyond the scope of this project. Going into this I was thinking of doing an indoor scene as it would allow me to put much more detail into the surroundings and assets.
This left me with Breaking Bad and The Martian to choose from. From the two I felt The Martian was a better choice as I thought the mars base was a good area to create. This is because I could travel through the base as though I was walking through it for my cinematic. It would also allow me to experiment with animation and effects in engine with areas such as doors and smoke. The Martian is also one of my favorite films so I am excited to recreate the environment and because of this I will be motivated to make it as good it can be.
Mood Boards- click to zoom


3 - The Martian research - 25/09/19
Updated: Dec 9, 2019
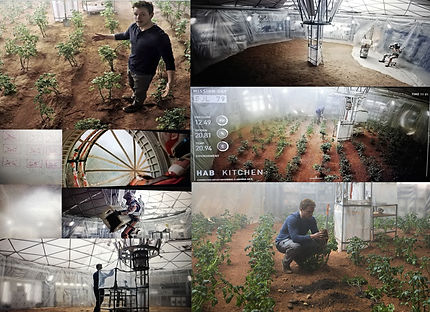
To learn the details of the base and get a good understanding of the layout I watched the film and paused to collect reference images which will help me create a accurate version. The images will help a lot with scaling and asset creation as I can use the size of the main character as reference to make sure everything is in proportion. It will also help with lighting and texturing as I have seen how all the different materials should be reacting in this setting.
From these images I have created a top down layout of my base and mapped out a possible route I could take for my cinematic. In the film there are only two main areas in the base, a main work area and a sleeping area. However in the 2nd half of the film the main character changes the main room into a farm. I wanted to include both the farm room and the main room so I decided to add an extra area to the base so I can include both. This is shown below with an image from the film and from my 2D plan.

I have made individual mood boards for each room which have many images with many different angles of the room. This is where ill be able to create an accurate version of each room as I have collected a large amount of reference.


My next step is to create a block out in Unreal to allow me to get an understanding of scale and sizing. I will also begin some simple construction and try testing some parts or assets by importing them into the engine.
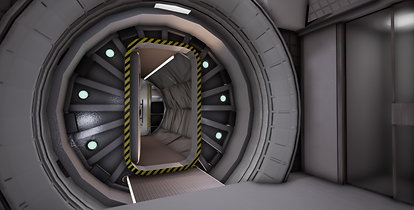
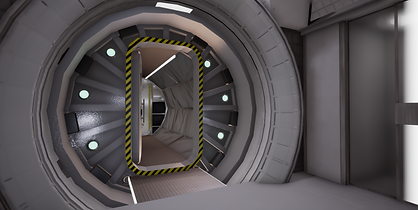
4 - Blockout and Beginning Construction- 02/10/19
Updated: Dec 9, 2019
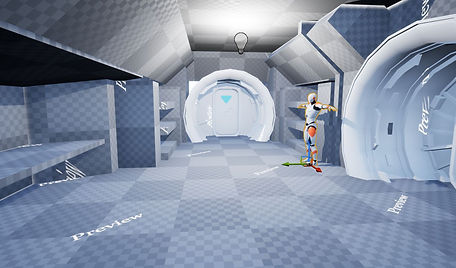
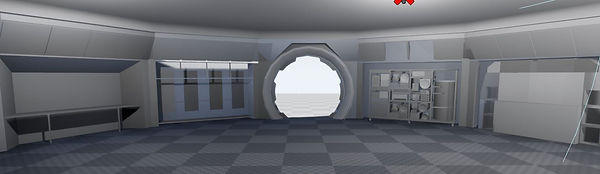
Since my last post I have manage to achieve what I had set out to do. I now have a clear plan of how my environment will look and how the cinematic will pass through it. I have also created a simple block out in unreal engine so I was able to make items to scale.
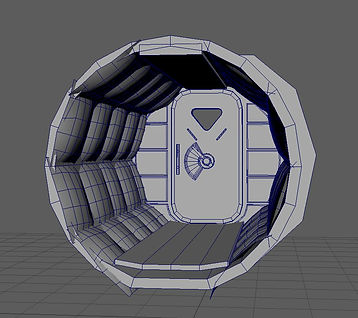
I then went onto create a part of my scene (Air lock) in Maya to import into Unreal to find issues or anything that needs changing.
This is more of an early build to test scaling and see what I liked and didn't like about it. I will probably look into changing the padding around the tunnel at a later stage as it doesn't look good at the moment.
My next task will be to continue making parts of my environment. My scene uses many of the same assets in each of the rooms so once I have made and area or doorway I am able to copy it around the scene saving a lot of time. I am hoping to have made the rooms within the next few days so I will have the large aspects of my environment out of the way.


5 - Living Room Scale testing, Build progression and nCloth - 07/10/19
Updated: Dec 9, 2019
Since I last posted I have modeled the basic structure of the living area in Maya. I started by blocking it out in Unreal engine using my references. I then imported it into Maya so I had the correct scale to begin adding detail. I have also been importing updated versions back into Unreal to make sure all my assets are to scale and it fits with the previous models I have made.
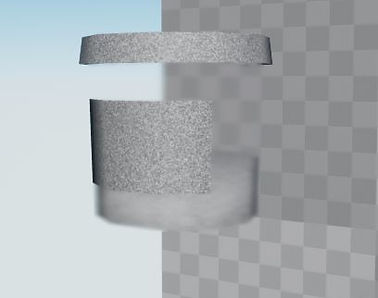
For the living area it includes 6 beds and I wanted to add duvets and sheets with a rippled affect onto them. To do this I used nCloth. I had not used nCloth before and had heard about it in my year 1 lessons. I researched the best way to achieve this effect and managed to find multiple sources and videos that assisted me in making a realistic looking duvet for my bed. I also had to make a low poly version so I could bake the nCloth onto it as the poly count was way to high for how much I wanted. I tested this bake in substance painter and am pleased with the results of the bake and look. I still need to texture it however I am planning on starting that once my whole scene has be made.
Baked Duvet in Substance Painter
nCloth videos

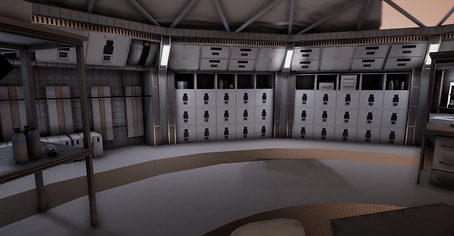
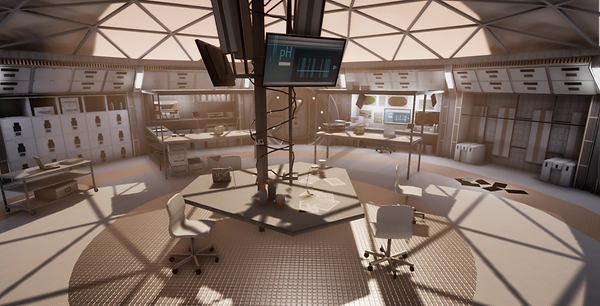
6 - Main Room - 14/10/19
Updated: Dec 9, 2019
I have finished making the main block out of my main room of my scene. I have also added a few assets which will allow me to see how full my scene will look once I start putting it all together. I have not added much to the scene in the center as I will do that once all my buildings have been made. I made a lot of repeatable assets that I can duplicate around the room. This will make unwrapping and texturing much easier. I feel there are a lot of things I can improve on such as baking a lot of textures on, such as the square draws which cost a lot of polys onto a flat plane or maybe put the textures on a trim sheet.

7 - Farm room - 18/10/19
Updated: Dec 9, 2019
I want to include and extra room to show the farm room which is made in the film. This is something I want to add if I have the time for it. This means I will focus on the main room and bedroom first before I think about putting too much time into it. This is mainly because of time limitations and other modules and if I am unable to make it in time for the deadline I look to complete it in my own time, maybe over the Christmas break.
The block out for the farm room was quite easy to make as it is almost an exact copy of the
main room but without as many assets. The main difficulty of this room is the plastic tarps hanging around the farm. I need to look into the best way to make the tarps and to look into how I can create an effective translucent material. I will be looking into this later in the term if I decide to make this room.
I also need to start looking into how to make trim sheets and what textures used in my scene I should use on it.
8 - Trim Sheets - 1/11/19
Updated: Dec 9, 2019
I started to look into trim sheets and where I could use them in my scene now that im starting to texture. I went out and did some research to gain a better understanding of them as I had never used them before. As I gained a better understanding of trim sheets I realized I would need to look into tiling textures as, especially for the walls there is a lot of tiled textures in which I could save a lot of texture resolution in using.
Trim sheet tutorials-
https://www.youtube.com/watch?v=DipfrjCgYW8
https://www.youtube.com/watch?v=Tspveb9bjYA
https://www.youtube.com/watch?v=CarefswACgs
https://www.youtube.com/watch?v=VEHsZniXguY
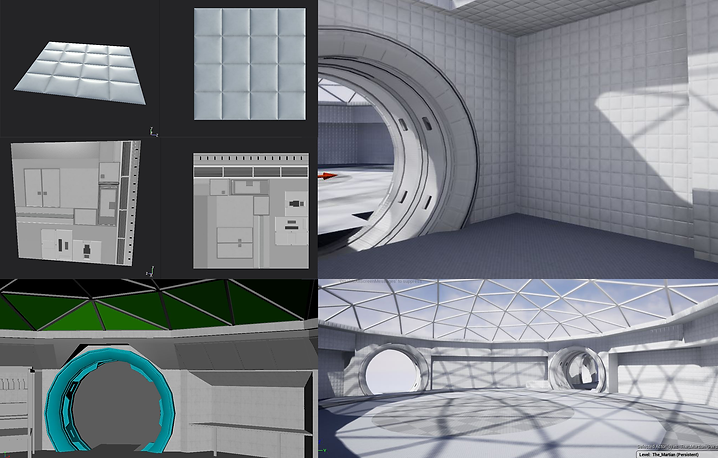
Here are examples of my current trim sheets and tiled patterns. I separated my models in Maya into colours to make clear what texture goes where, and then applied the base colour map to them to then match the scale and position.
These images show some of my trim sheets, tile-able textures and separation of colours in Maya. Once the textures for my trim sheets and tiles were created I then added the base colour maps into Maya where I could scale the tiles and line up my trim sheets properly. This is seen in the bottom left image where the roof and door were separated by block colours and the walls had the tileable wall base colour added on. This meant I could very quickly import my walls into the engine and the scale would already be correct.
9 - Importing Main Block Out - 4/10/19
Updated: Dec 9, 2019
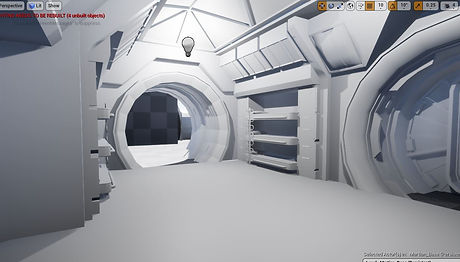
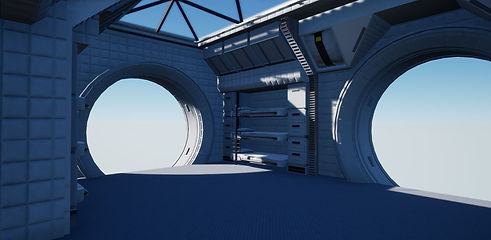
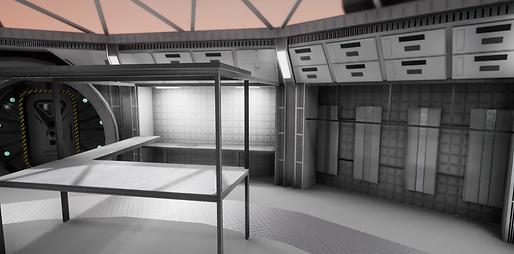
Although I have previously been importing my assets into Unreal I have started to import it all for the final build. This is because the other levels in Unreal were just tests, and my assets and textures were very poorly laid out. I have managed to unwrap and import the textured versions of both the main room and the bedroom. This is only the shell with a few assets added so they are very empty, however it helps a lot with understanding what my final outcome will look like.

10 - Marvelous Designer - 5/11/19
Updated: Dec 9, 2019
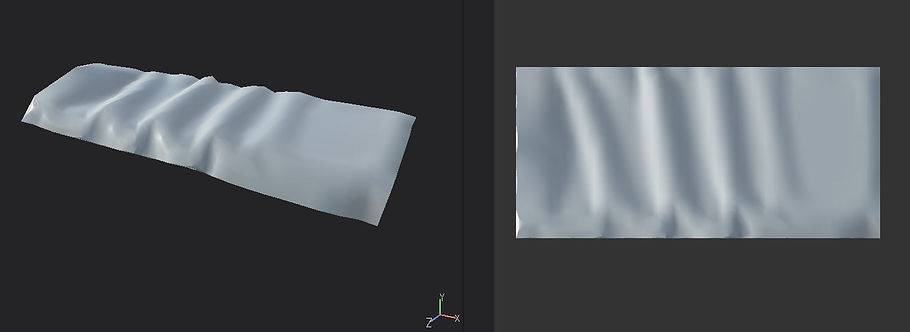
For my main room I needed a cover for part of my roof. For this I wanted it to look like a material resting over the pattern of the triangles as it does in my reference images. To do this I used Marvelous Designer(MD). I had never used MD before and I was introduced to it in my character module for clothing. I did think about using nCloth again like I did for the bed covers however after being introduced to MD it was the much better option.
I imported my roof which had an extruded frame to allow the cloth to droop down creating the texture I was after. Being able to distort the cloth after I simulated it meant I was able to come away with a good high poly.
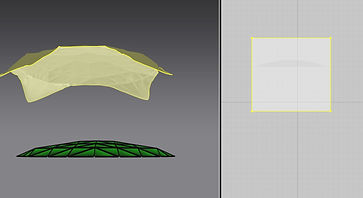


Here is the final bake of the roof imported into Unreal. The texture needs some editing in substance painter again, but you can see the bake has been successful

11 - Glass Blur - 7/11/19
Updated: Dec 9, 2019
For my glass roof and multiple other objects I wanted to add a blur. To do this I looked around and did some research on how i would get the best results. This ended in me finding a video which told me how I could create a blur effect and make it variable depending on how transparent I wanted it to be.
I feel this was successful as it created the different effects I was looking for. The material instances where very useful as I could vary the strength of the blur allowing me to cheaply change the intensity it to fit what I wanted to use it for.


12 - Emissive Lighting - 7/11/19
Updated: Dec 9, 2019
When looking into lighting my scene I was suggested a video on emissive lighting and I decided it would be fitting to use this technique to light parts of my scene. The video taught me how to create a emissive material in Unreal and how I could create material instances of them to alter the intensity and colour depending on what I was using them for.
I feel they give an accurate representation of the lighting from my source images and are much better suited to the scene than using point and spot lights.


13 - Farm Room Scoping - 10/11/19
Updated: Dec 9, 2019
After seeing how long this project is taking me I have decided to not add the farm room to my scene. I hope this will allow me to put more time into what I have so I am able to polish what I've already done. I hope to finish the farm at a later date to complete my original vision but this will probably be over the Christmas break, after the marked deadline.
14 - Texturing - 12/11/19
Updated: Dec 9, 2019
While texturing my scene and importing the textures onto my assets I started to realize my scene was too white. The scene I am imitating is a very white scene however there is a lot of other colours that break it up. I plan to go back and edit my textures to add additional colours to the scene. I have also not finished importing certain assets such as poster and picture plains which will break up the scene well.
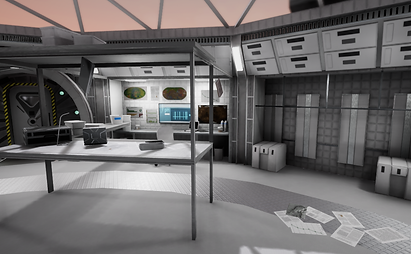
I found good areas in my scene were the desk areas, the doors and the water filter wall as they added a lot of variation to my colours. other areas looked very blank and empty but i plan to add additional assets to these areas to fill them up and make them look busy.

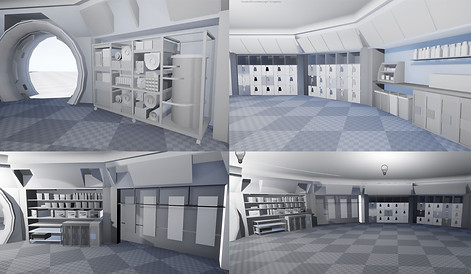
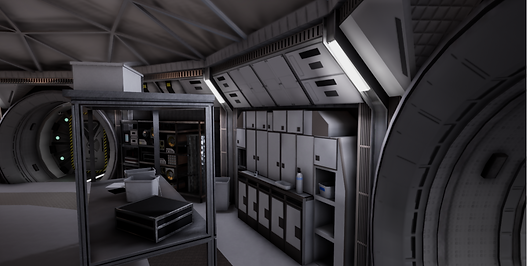
15 - Textured Assets and Finalizing Layout - 14/11/19
Updated: Dec 9, 2019
I have now textured the majority of my assets and have started to fill up the scene. This is definitely helping in breaking up the scene as it is creating areas of rest and noise throughout the scene which is what was needed. Also re-texturing some of the assets has helped to bring a lot more life to the scene than before.
From filling the room I also noticed there were areas which looked too full and empty which made me return to my mood board images to check if anything was missing or needed. I decided to duplicate a few assets in empty areas of my room as it definitely made the room feel more complete. This has stopped the scene from having areas with little detail.

Even the small addition to this trolley makes the scene feel more complete.
16 - 3rd Year Feedback -
Updated: Dec 9, 2019
During a peer review session we discussed how the lighting felt flat. We felt it could be pushed much further than it currently was. Researching options, I found that increasing the ambient occlusion in the post processing volume asset as well as adjusting my sphere reflection captures would improve the overall lighting. This made my scene look much better as it made my scene look much less flat and highlighted the areas which needed shadow.
Without Ambient Occlusion With Ambient Occlusion
As you can see adding ambient occlusion made a huge difference in the corners and on edges to which is something that was missing before.
With the lighting they recommended that I pick a reference to base it on. At this point I was undecided on whether I wanted the scene at night or during the day and whether the sky should be a clear blue sky or should it be tinted orange by the dust. They also said to think about light direction and how the directional light should shine onto the scene, especially the main room.
Another part of the lighting they mentioned was the lighting of the lights in the main room. They said to think about the brightness and the contrast between the natural lighting and the man made lighting to find a good balance between the two.
From this image you can see it is almost 100% lit by the man made lighting and they said using the sunlight would add a nice contrast to the scene.
17 - 3rd year feedback part 2 - 02-12-19
From the first time I spoke with some 3rd years I feel I had worked on what they had said and implemented some natural lighting to my scene. I chose to use an orange tint to the sky to bring a nice context to the white interior. I had also edited the man made lighting to be less intense and I feel the orange natural lighting made a good contrast to the primarily white scene.
After looking at my improved scene they suggested using exponential height fog. This would add the illusion of dust in my scene and would add a better atmosphere. It would also allow the light beams to be seen coming down from the sky which for one looks really good and it also allow the focal area of the scene to be highlighted.
I feel very grateful to the help I got from the 3rd years as I feel this little addition along with there advise about lighting made my scene look 100% better.

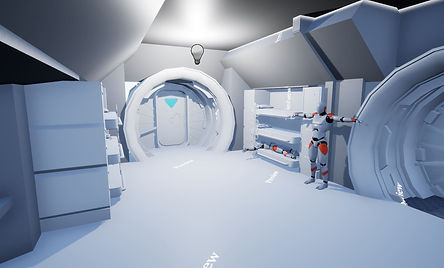
18 - Cinematic - 05/12/19
With my scene finally finished I made a cinematic to show it off. Creating the cinematic was the first time I had used cameras in Unreal. I used Youtube tutorials and asked my teachers and peers for help so I could get a good understanding of how to use the cameras. For the moment I have learnt the very basics such as moving and rotating the cameras for it to flow throughout my scene. I plan to become more knowledgeable of how to use the cameras in the up and coming months so I am able to display my work well for my portfolio. I still feel I was able to capture all of my scene while focusing on the key parts of it.
